Interactive Jobs on Discovery
Different ways of launching interactive jobs in Discovery are discussed below.
Open OnDemand
-
One of the easiest ways to launch interactive jobs is through Open OnDemand. Please refer the documentation → Interactive Desktop to launch interactive desktop through which you can have an interactive command-line shell on compute node and run interactive jobs.
-
This will launch an interactive xfce session on the compute node and it’s highly recommended over the next method Interactive Shell on Compute Nodes Using Command Line which is discussed below.
Interactive Shell on Compute Nodes Using Command Line
|
To launch interactive shell on compute nodes using the command line, it’s recommended to use |
-
Use the
sruncommand to run jobs interactively on the Discovery HPC cluster. Visit the → Slurm Commands page for more details about thesruncommand. -
sruncan also be used to run a login shell on the compute nodes which enables to run commands interactively. Consider the below example.srun -n 1 -c 2 --mem-per-cpu 5g -p normal -t 01:00:00 --pty /bin/bash -
Break down the parts of the command into a table format.
Flags
Alt
Description
-c--cpus-per-task
The number of cpus to be used per task.
--mem-per-cpuN/A
The amount of RAM per CPU.
-p--partition
The partition to use.
-t--time
The execution wall time
--pty/bin/bash
The pseudoterminal (/bin/bash)
-
The command above simply means that you want to run a login shell
(/bin/bash)on the compute nodes. When the command is executed, you’ll automatically get an interactive session on one of the compute nodes after which you can then run your commands interactively. You are also put into the working directory from which you ran the launched session.It’s crucial to specify the
--ptyflag for this to work as intended. -
Now that you are logged into one of the compute nodes. Hence, whatever command you execute, for Example,
srun hostnamewill be executed once(-n 1)using 2 cpus, based on the value of the srun flags declared above. -
You can keep executing as many commands as you want. However, bear in mind that your interactive session on the compute node you are currently on, will be killed when the Walltime specified above elapses. Please see the example output below.
Example
-
Log in to Discovery and execute the command below
srun --ntasks 1 --cpus-per-task 2 --mem-per-cpu 10g -p normal -t 01:00:00 --pty /bin/bash -
You’d notice that the hostname changed from
[username@discovery-l1 ~]$to[username@discovery-g9 ~]$. This means you’re currently logged in to one of the compute nodes and now you can start executing jobs interactively. Next, execute the command below which prints the hostname of the node that you’re currently logged in to.echo "Hello from $(hostname)"*Output*
Hello from discovery-g9.cluster.localFrom the above image, one can infer that the session switched from the login node to one of the compute nodes after the
sruncommand gets executed. You can also see the output of the second command executed on the compute nodeHello from discovery-g9.cluster.local.For more details on other useful srun flags please visit Slurm’s documentation on srun here https://slurm.schedmd.com/srun.html
X11 Forwarding with srun
X11 forwarding is a software that allows for the access of graphical Linux programs remotely through an SSH client. This tutorial describes how you can perform x11 forwarding interactively using the srun command.
|
Before you continue this section, please make sure to visit the tutorial on the link → X11 Forwarding to familiarize yourself with the prerequisites. |
Example
-
Ensure that X11 server is running on your local machine. See how to do this here → Run X11 Server
-
Log in to Discovery with X11 enabled using the CLI or putty. To see how to do this, visit → Connecting to Discovery with X11-Forwarding enabled
-
Set up the OpenGL Remote Acceleration environmental variable on the remote server(Discovery). To see how to do this, visit → Enable OpenGL Remote Acceleration
-
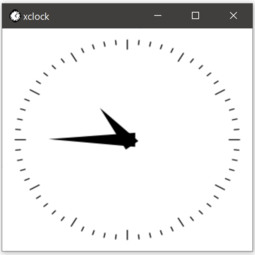
Execute X11 forwarding interactively using the
sruncommandsrun -p normal --cpus-per-task 1 --mem-per-cpu 2g --ntasks=1 --time=0-1:00:00 --x11 xclockOutput: