PuTTY
PuTTY is a free and open-source terminal emulator application. It was first written for Microsoft Windows, but it has also been ported to some other Unix-like platforms.
Terminal Emulator
In the past, when personal computers (PCs) were rare, users connected using devices called terminals. These were essentially a display device and a keyboard. A terminal is a physical device that transmits and receives character data, and displays it on a display or a paper printer. The terminal communicates with a computer that’s typically somewhere else, using communications cabling.

The purpose of an emulator is to accurately reproduce the behavior of some hardware. Emulation refers to the ability of a computer program to emulate (or imitate) another program or device. Hence, a terminal emulation software, such as PuTTY, replicates the function of a terminal. In this way, a user can access a distant terminal system. An emulator typically enables the host system to run software or use peripheral devices designed for the guest system. It can act as a client for network protocols (such as SSH, Telnet, rlogin) to enable remote computer sessions.
When thousands of clients store data on a single server, safety is the first priority. Hence, most of the hosting services are built on Linux OS, as it provides better safety for client data. However this poses a greater challenge for Non-Linux users to access the server. But, terminal emulators, such as PuTTy, enable Non-Linux users to interact with Linux servers from a Non-Linux OS.
|
For example, NMSU supercomputer Discovery is hosted by NMSU. However, students, faculty, and staff can access it through their own PCs with installed PuTTY. Thus, using PuTTY, they can log in to Discovery, use its memory, and available software. For example, users can run a MATLAB code and get results, without installing the MATLAB software on their PCs, or using their PC’s memory. |
Purpose of PuTTY
PuTTY is most commonly used:
-
as a File Transfer Protocol PuTTY can connect to a remote machine through SSH. SSH (Secure shell) is a protocol that allows a secure connection. In this way, a PC can securely send and receive data from a remote server. PuTTy provides various file transfer features like FTP and SFTP, depending on the user security requirements.
-
to generate SSH key Nowadays, passwords are prone to security threats specially when you are dealing with a lot of confidential data online. With SSH key, you can just point to the public key and login to the server any time without entering any password or user name.
1. Getting and Installing
- Go to the link to downloaD a copy of the software for the Windows platform from → Download PuTTY
- Now, Download the installation package:

|
If you have a 64-bit computer, it’s recommended that you install the 64-bit version Almost any computer bought after 2015 has a 64-bit processor, except for the very cheapest ones. Many high-end computers sold several years before that. If you don’t know or don’t care, it’s always safe to use the 32-bit version. |
- Starting the installer: On Windows 10, the Edge browser offers to run the installer when the download is complete. Just click to install the software. On older versions of Windows, you may need to run the installer manually. Open the Windows Explorer (right-click on the Windows logo in the bottom left corner) and navigate to the Downloads directory (or wherever you saved the installer). Then, double-click on the filename.
|
The installation has to be performed with Administrator rights (either using the Administrator account or your personal account must have Administrator permissions). |
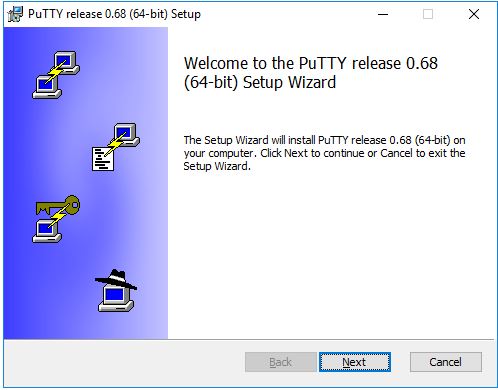
- Configuring and installing: When the installer starts, it shows the welcome screen. Just click Next.
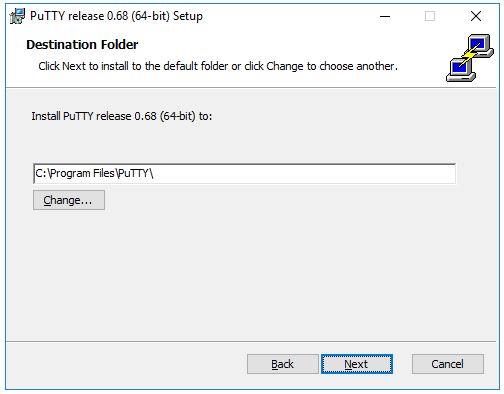
The installer then asks for the Destination folder in which to install the software. Almost always it’s best to use the default value. Just click Next.
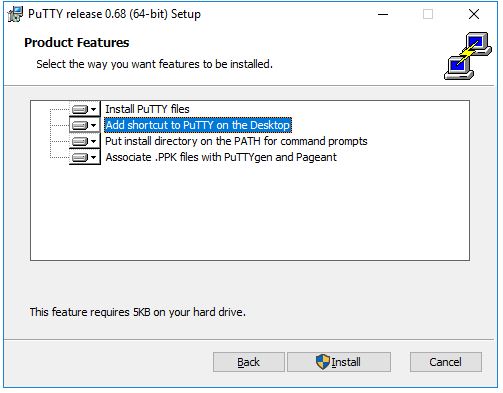
Then, the installer asks to select product features to install. You probably want to add a shortcut on the desktop if you expect to use the software often. All the other options generally should be enabled. When ready, click Install.
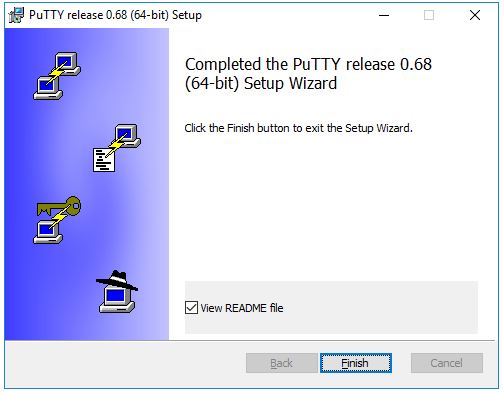
When the installation has completed successfully, it should show a "Completed" screen. Click Finish to exit the installer.
2. Running PuTTY
Once installation successfully completed, you should test to make sure that PuTTY runs correctly and you can find the program. If you installed a shortcut on the desktop, you should be able to find the icon for PuTTY. Try (double-)clicking on the icon. It should start the software.
Otherwise, you should be able to find the software from the Windows Start menu in the bottom left corner of the screen. The menu looks different in each version of Windows. On Windows 10, scroll down until you see PuTTY. Open the group, and select PuTTY.
|
If you are accessing Discovery from outside the NMSU campus, you have to run the VPN before you proceed! |
3. Log In
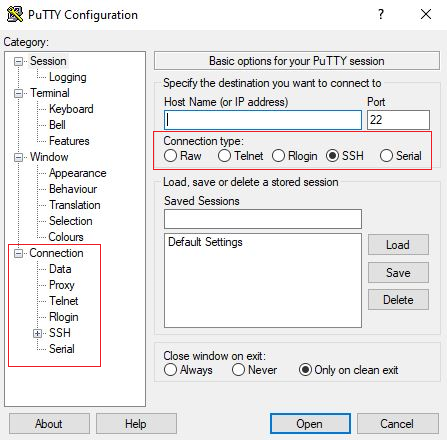
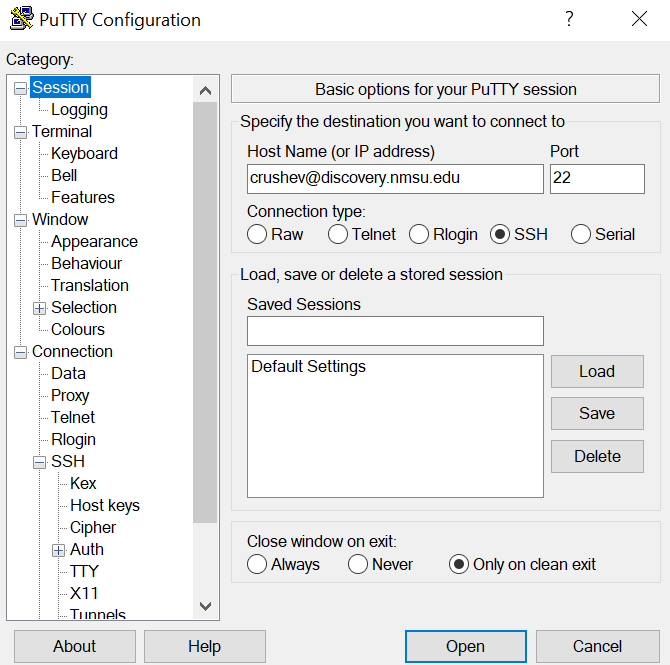
When the software starts, you should get a window with the title "PuTTY Configuration" with a field Host Name in the upper middle part. Try entering a host name to connect to in that field, and click Open.
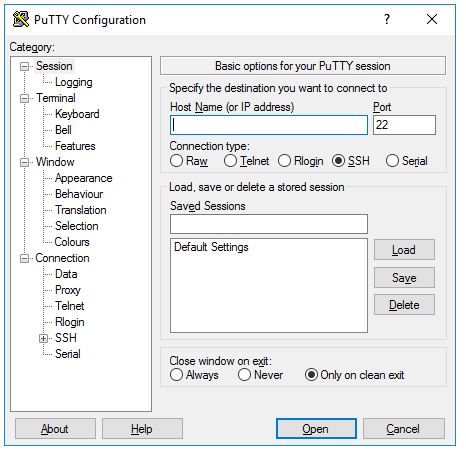
Host Name: discovery.nmsu.edu
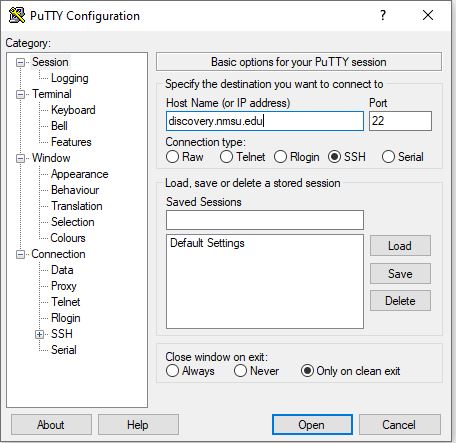
Other Options:
-
Port The port field specifies the TCP/IP port to connect. For SSH, this is the port on which the SSH server runs. Normally it can be left to 22. If for some reason you need to connect to a different port number, just change the value.
-
Connection Type The Connection type selection seldom needs to be touched. Just leave it as SSH. SSH is a secure, encrypted communications protocol designed to ensure your password and data are maximally protected.
-
Load, save, or delete a stored session This section allows you to save your settings as named profiles. Just write the name of your new profile in the Saved Sessions box and click Save to create a new profile. The host name and your other settings are saved in the profile. Saved profiles appear in the larger box below it. Initially it will contain just Default Settings. Profiles you save will be included there. Select a profile and click Load to use a previously saved profile. Select a profile and click Delete to delete a profile that’s no longer needed.
-
Close window on exit Finally, the Close window on exit setting specifies whether the terminal window should be automatically closed when the connection is terminated. There is rarely any need to change it from the default value of Only on clean exit.
4. Connect
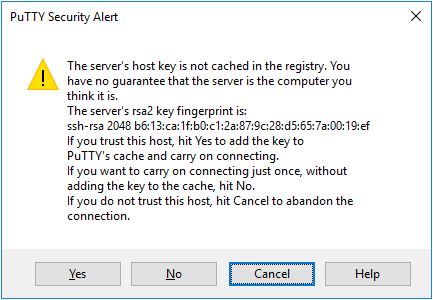
When you connect to a server for the first time, you are likely to see a PuTTY Security Alert dialog about server’s host key not being cached in the registry. You should just click Yes.
Enter your credentials After the security alert, you should get a terminal window. By default, this is a black, very bland window. It should first ask for your user name and then password. Enter your MyNMSU username and password.
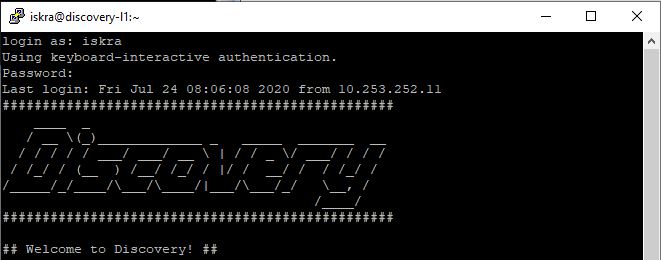
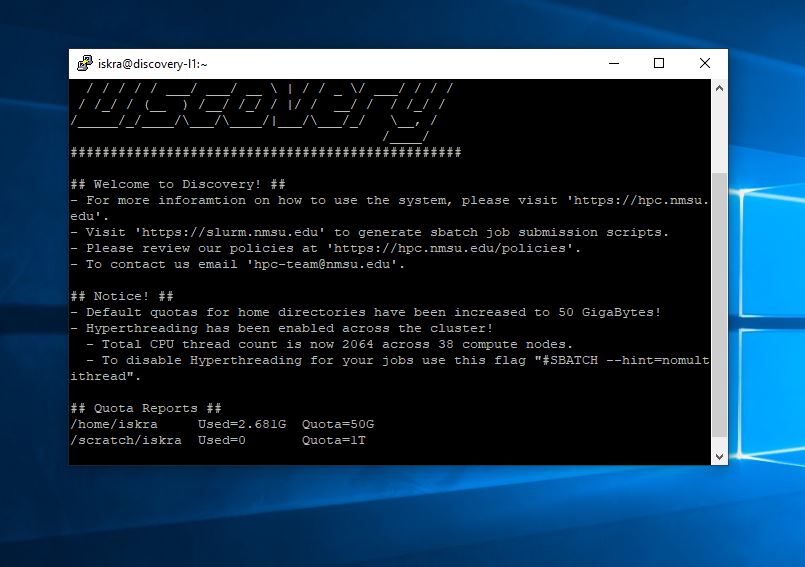
Use the terminal After these, you should get a command line on the server. You can then type into the terminal Window. You are now connected to the server, and anything you type in the Window is sent to the server. Server’s responses are displayed in the Window. You can run any text-based applications on the server using the window. The session terminates when you exit the command-line shell on the server (typically by typing exit) to the command line or pressing Ctrl + D. You can also forcibly end the session by closing the terminal window.
5. Authentication options - public key authentication
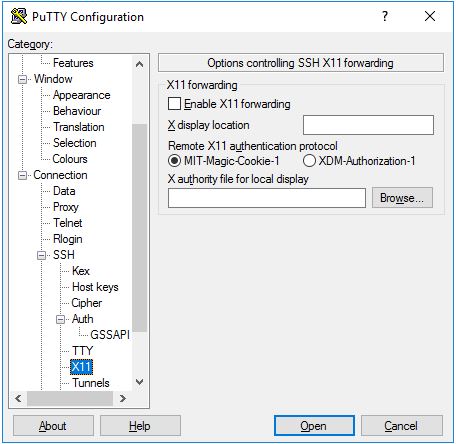
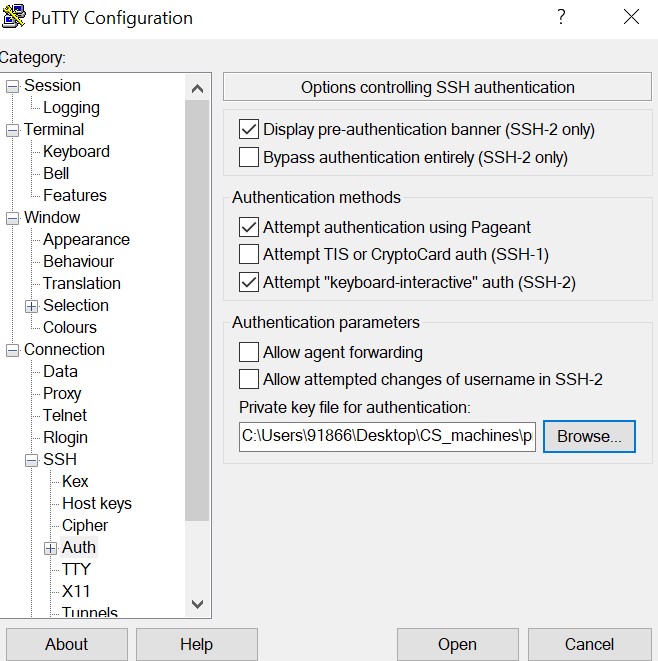
The Auth subtree contains some options that may be useful. When Auth is clicked, it shows a pane titled Options controlling SSH authentication. image::tutorials/PuTTY/putty_auth.jpg[putty_auth.jpg]
To enable public key authentication, you need to generate an SSH key. PuTTYgen is a key generator tool for creating SSH keys for PuTTY.
- Download and install PuTTYgen: Go to → Download PuTTYgen and download PuTTYgen.

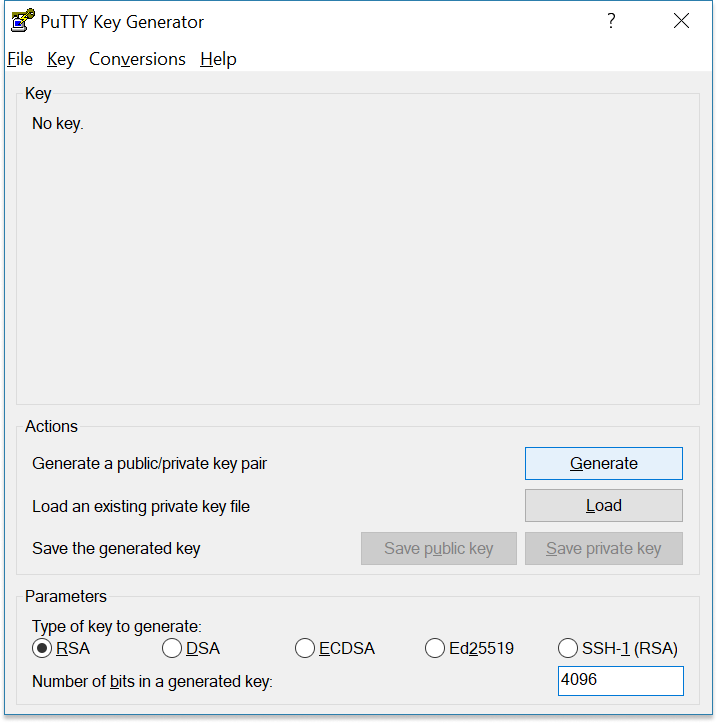
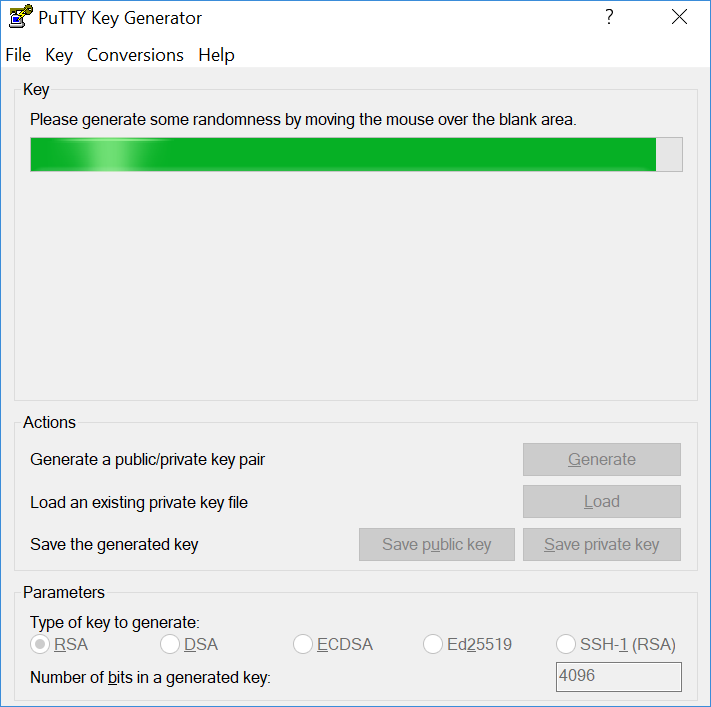
- Create a new key pair: To create a new key pair, select the type of key to generate from the bottom of the screen using RSA with 4096 bit key size is good for most people. Another well-known alternative for RSA is ECDSA. Then click Generate, and start moving the mouse in the Window. Putty uses mouse movements to collect randomness. The exact way you are going to move your mouse can’t be predicted by an external attacker. You may need to move the mouse for some time, depending on the size of your key. As you move it, the green progress bar should advance. After the progress bar becomes full, the actual key generation computation takes place. This may take from several seconds to several minutes. When complete, the public key should appear in the Window. You can now specify a passphrase for the key. You should save at least the private key by clicking Save private key. It may be advisable to also save the public key, though it can be later regenerated by loading the private key (by clicking Load). It’s strongly recommended to use a passphrase for private key files intended for interactive use. If keys are needed for automation (For Example, with WinSCP, then they may be left without a passphrase.
- Specify a key passphrase: You can now specify a passphrase for the key. You should save at least the private key by clicking Save private key. It may be advisable to also save the public key, though it can be later regenerated by loading the private key (by clicking Load). It’s strongly recommended to use a passphrase for private key files intended for interactive use. If keys are needed for automation (For Example, with WinSCP, then they may be left without a passphrase.
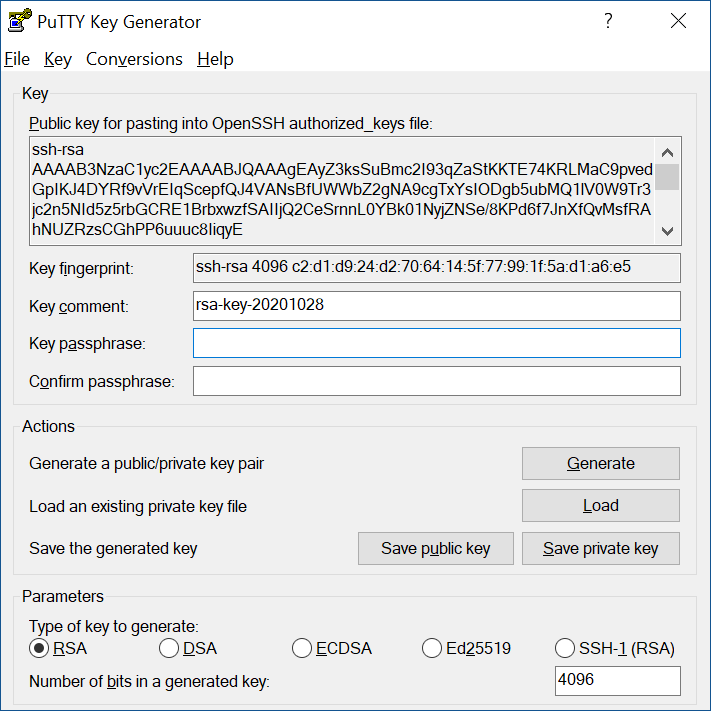
- Save Private Key
Click Save private key to save the private key to your local machine. Click save after giving the filename.

- Setting up public key
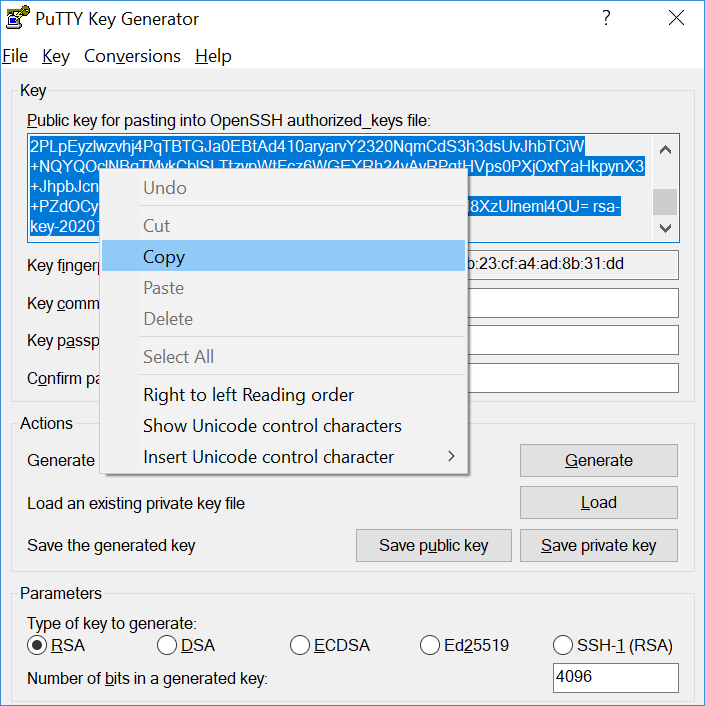
The public key has to be transferred to the Discovery. Hence, select the whole key and copy like below:
-
Login to the Discovery using the credentials. Run the following command to go to the
./sshdirectory.
cd ~/.ssh-
Run the below command to create/open the file
authorized_keys.
vi authorized_keys-
Paste the copied public key file in the
authorized_keysfile. Then, save and close the file.
ssh-rsa AAAAB3NzaC1yc2EAAAABJQAAAQEAjoAD5ikBYfDDdy1sLegiVIwfC9xTAbWaW8nNHTobUeNXBy251KeYqOAE8eq6ccGJh4lvUC6tVqXeyoGXoHpYP4NZ5C07ZfCBmhl5TzEl/cXE+qQTT3Kw3HYAL0K9pDjdTveZ2T7aizw2Hu3dU9iybROqy
5DyQbTrA33chd55Y80TBmf4kzYRnpWj95pUbWUwM3sTLZbbLgTROdqWIA6QiMYVZGNgUcSWjPuanMloyK3neVhGOAew+nXSTXxBrYtuP0Q5XhIPMROP6NKbzEPy1yJLFvYYN/xhfT+HN671ZOGVfGSCePbQfI0ZaPbefM+iGpm7yfTURL+HVCFNLqTkJw
== rsa-key-20201023-
Now, set the read, write, and execute permissions to the
~/.sshdirectory, and `~/.ssh/* ` files. Run the below command from the home directory in Discovery.
chmod 700 ~/.ssh
chmod 600 ~/.ssh/*|
chmod 700 sets read, write and execute permissions to the user/owner while chmod 600 sets read and write permissions to the user/owner. |
-
Logout of the discovery. Open
PuTTyand enter the<username>discovery.nmsu.eduin Host Name text entry.
- Loading Private Key:
-
Click
Authtab and then browse the path where you have stored theprivate key.
-
Click
Openand you will be able to ssh into discovery without even entering the password.
Using username "your-username".
Authenticating with public key "rsa-key-20201023"
Last login: Thu Oct 22 23:13:18 2020 from 10.253.233.20
#################################################
    ____  _
   / __ \(_)_____________ _   _____  _______  __
  / / / / / ___/ ___/ __ \ | / / _ \/ ___/ / / /
 / /_/ / (__  ) /__/ /_/ / |/ /  __/ /  / /_/ /
/_____/_/____/\___/\____/|___/\___/_/   \__, /
                                       /____/
#################################################

## Welcome to Discovery! ##
- For more inforamtion on how to use the system, please visit 'https://hpc.nmsu.edu'.
- Visit 'https://slurm.nmsu.edu' to generate sbatch job submission scripts.
- Please review our policies at 'https://hpc.nmsu.edu/home/resources/policies'.
- To contact us email 'hpc-team@nmsu.edu'.
.......
.......