WinSCP
Introduction
-
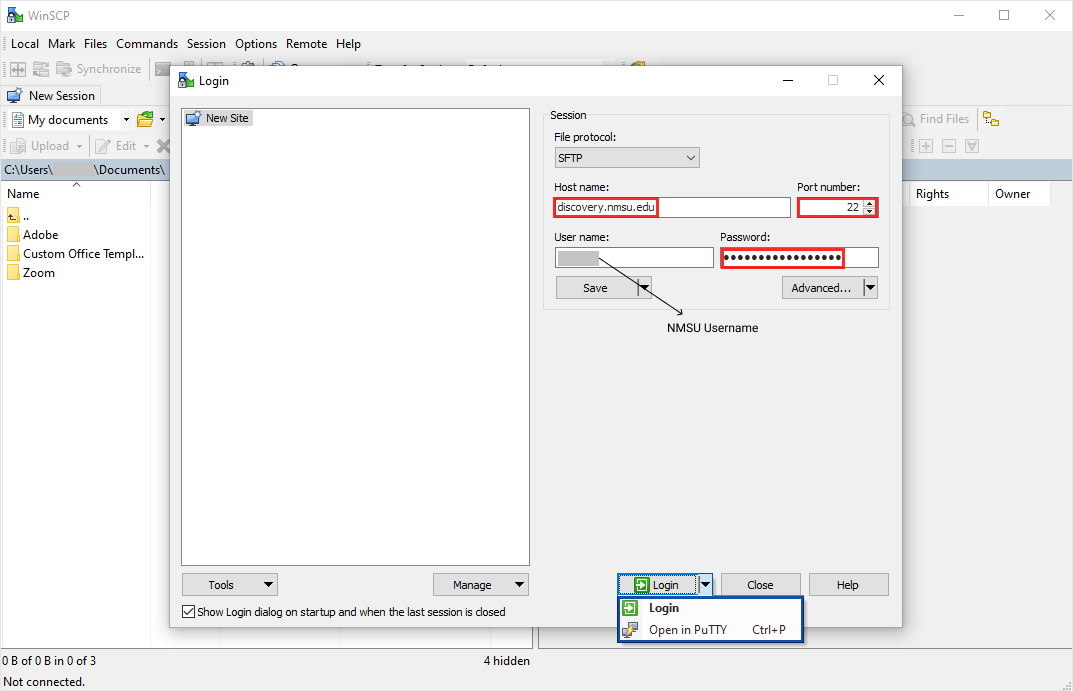
WinSCP is a free and open-source SFTP and FTP client software that has a Graphical User Interface (GUI) which supports file management between local machine and remote system for Windows users. Click the following link → Download WinSCP to download the software and then install it. Once installed, open the application and enter the following values:
If you want to access Discovery and manage files via WinSCP, you require NMSU VPN access if you’re outside of the NMSU network. Read the VPN information at the link → NMSU VPN Access.
Configuration
| WinSCP Configuration | Values |
|---|---|
Host Name |
discovery.nmsu.edu |
Port Number |
22 |
User Name |
NMSU username |
Password |
NMSU password |
|
If you want to open in PuTTY, select the Open in Putty option which shows up after clicking the dropdown icon next to the Login button. |
Output
-
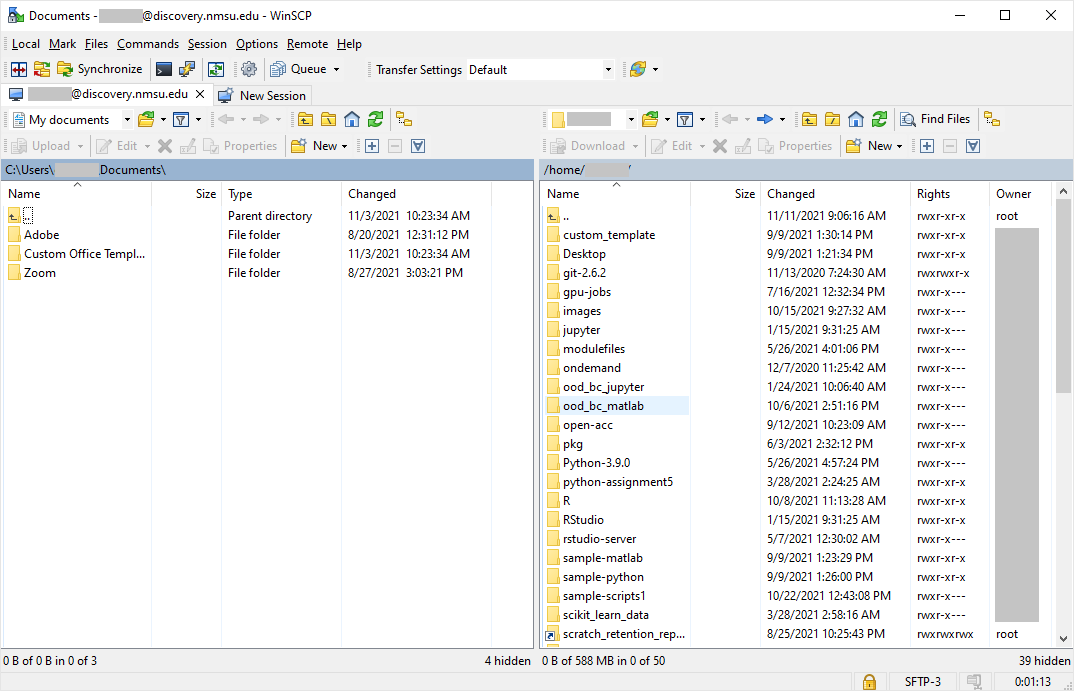
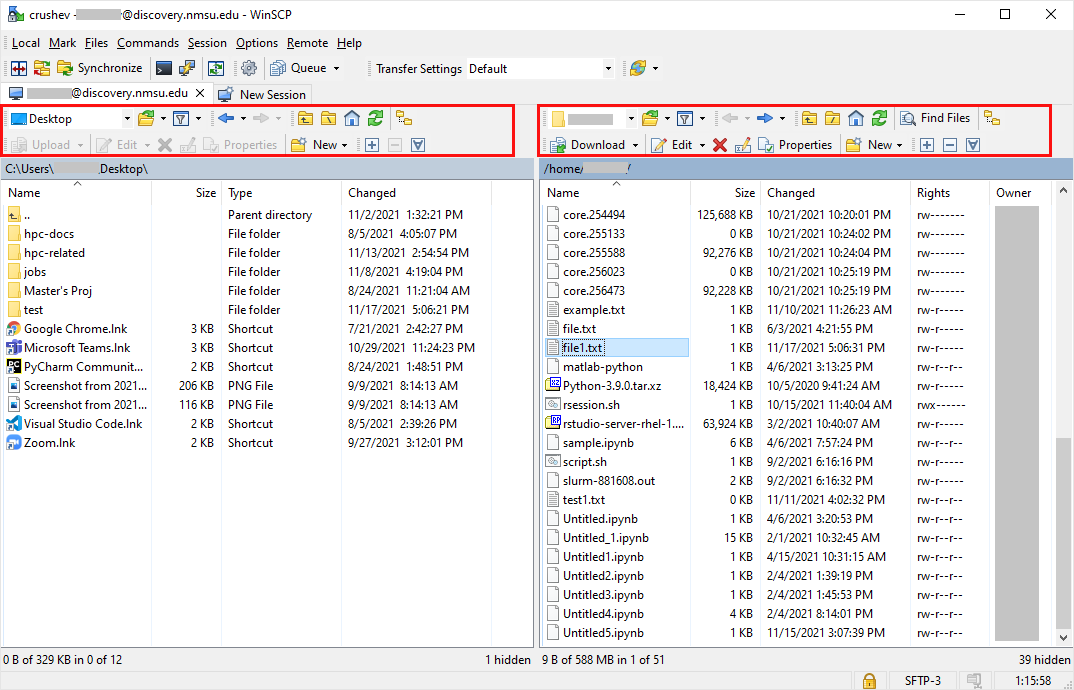
On successful authentication, you can now transfer files from your local machine to Discovery and you will see a screen similar to below.
-
The left side of the window shows your local workstation’s files and directories whereas the right side of the window displays the files and directories associated with your remote Discovery account.
Uploading Files/Directories from Local Workstation to Discovery
-
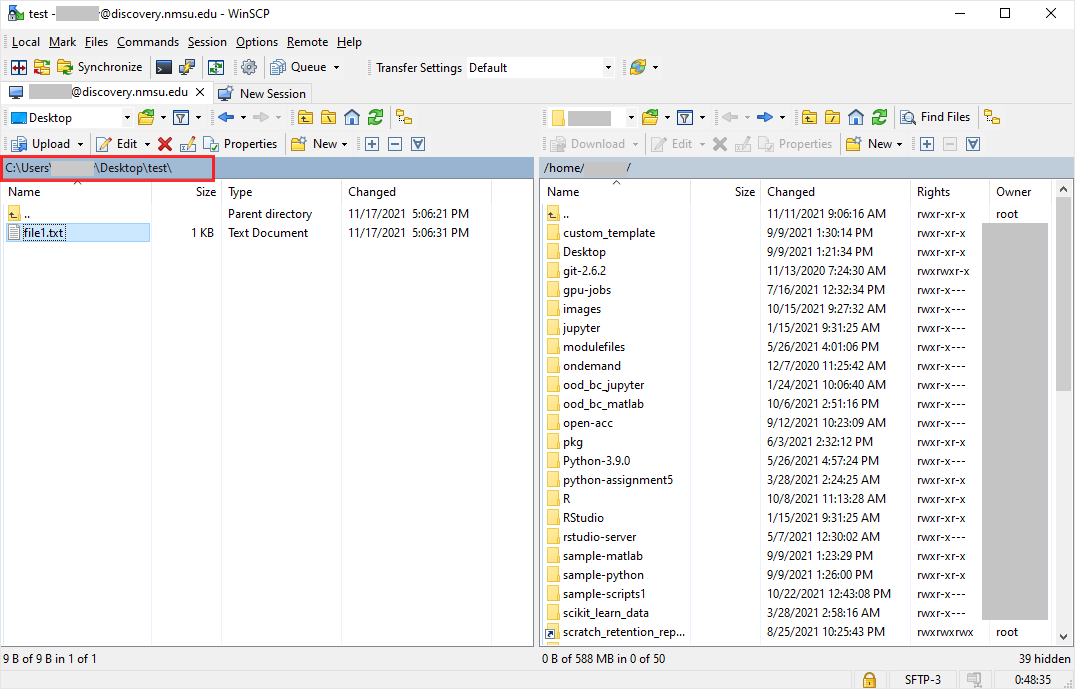
To upload a file/directory from your local workstation to remote folder in Discovery, first select the desired file/directory of local workstation like below.
-
You can also the blue bar(highlighted in red color in the above image) to move up directory levels.
-
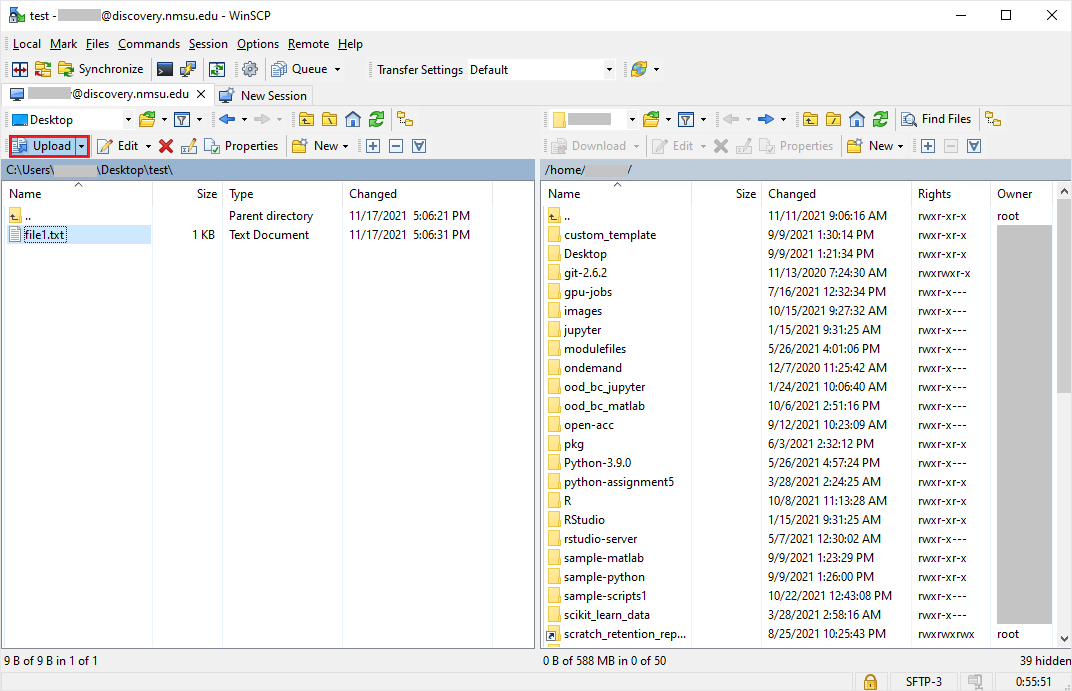
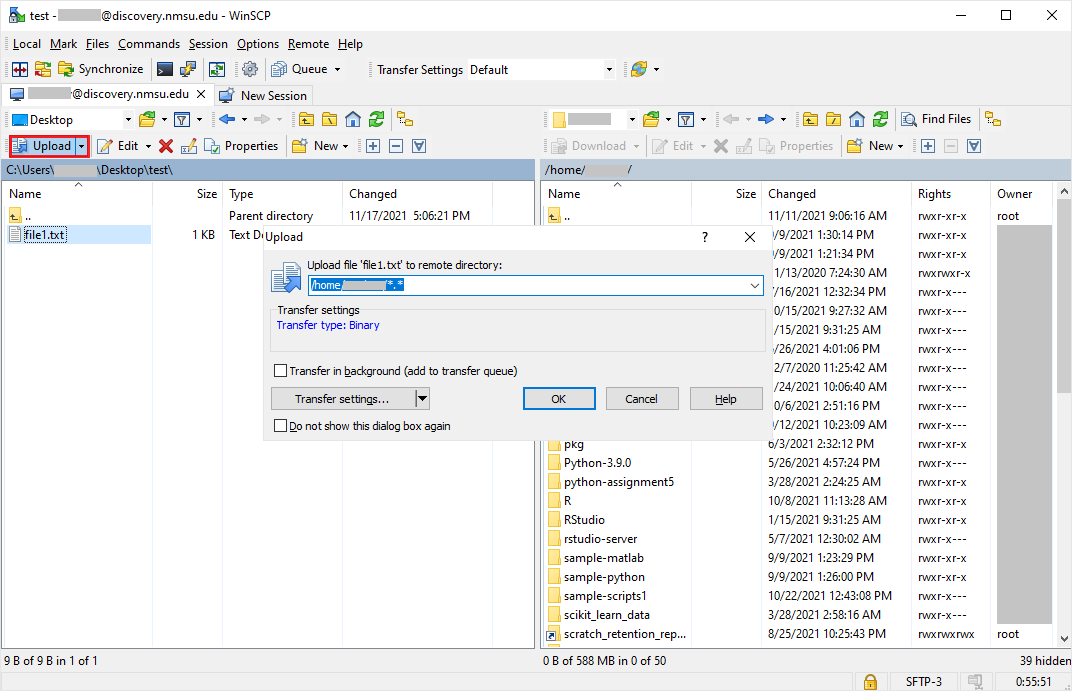
Next, Select the upload button like below.
-
You will get a popup to enter the path of the target location(Remote Discovery) where the file/directory needs to be uploaded. Enter the path and select OK. Your file/directory will be uploaded successfully.
Another quicker way to transfer file/directory from local workstation to remote Discovery folder is simply drag and drop the file/directory from local system(left side of the window) to remote Discovery folder(right side of the window).
Downloading Files/Directories from Discovery to Local Workstation
-
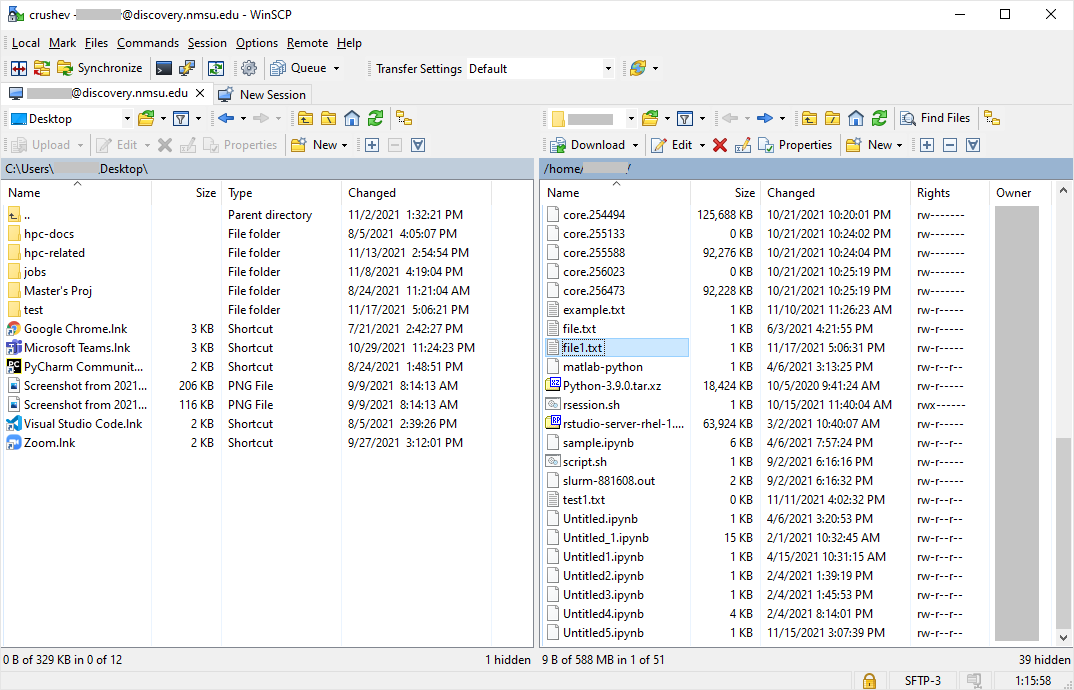
To download a file/directory from remote folder to your local workstation in Discovery, first select the desired file/directory of remote Discovery folder like below.
-
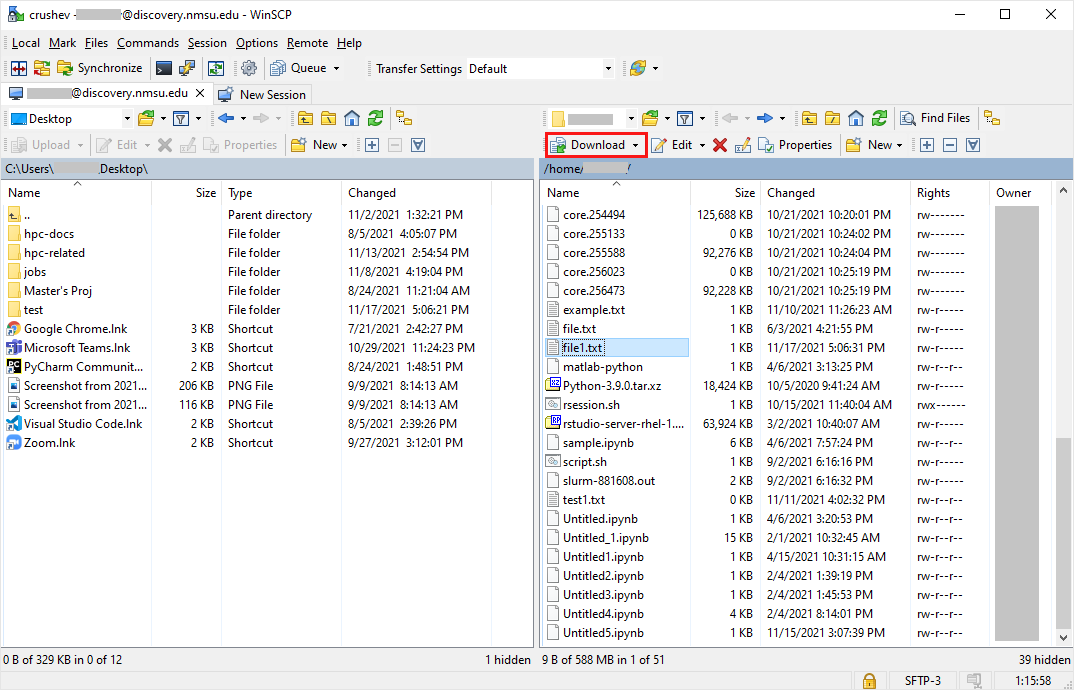
Next, Select the Download button like below.
-
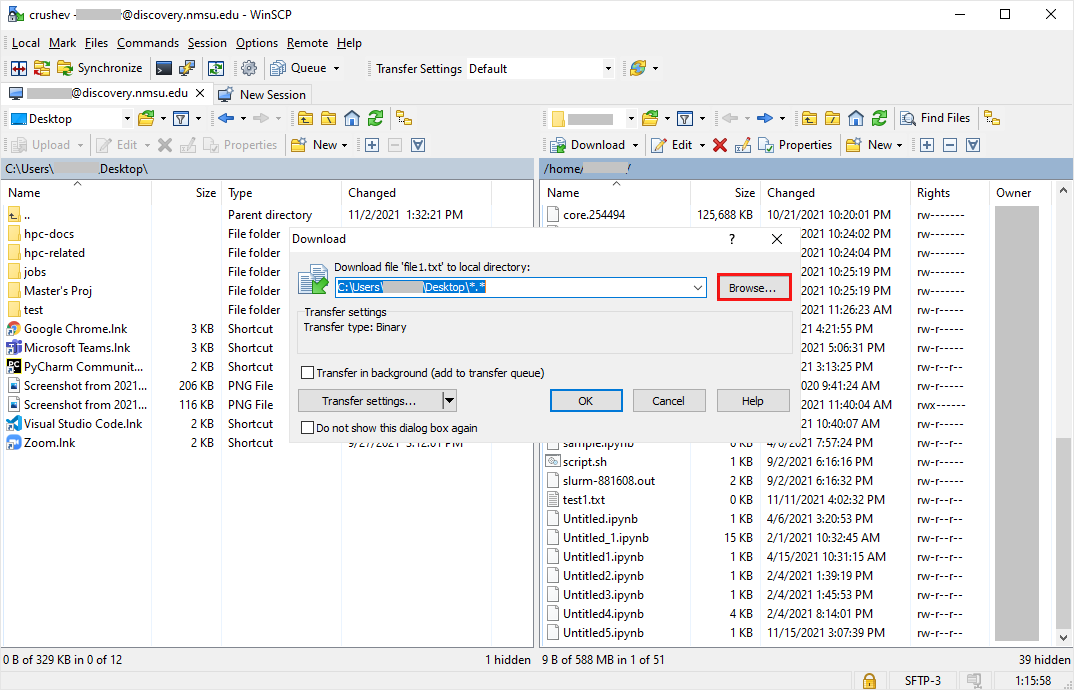
You will got a popup to enter the path of the target location(Local Workstation) where the file/directory needs to be downloaded. Enter the path and select OK. Your file/directory will be downloaded successfully.
You can also use the Browse button to browse the target location of your local machine.
You can also drag and drop the file/directory from remote Discovery folder to local machine to download files/directories.
Other Utilities
-
There are various utilities(highlighted in red color in the below image) available for file management in WinSCP like creating/editing/finding/deleting/selecting/renaming files and directories, opening/switching directories, so on.
-
If you’re not a windows user, there are various free and open-source SFTP GUI software available in the internet.
-
For more information about WinSCP, watch the YouTube video → WinSCP File Transfer video
-